Chocolate Custard Porridge

I came up with this quick little breakfast treat recipe last winter, and as the cold mornings have slowly been creeping in on us yet again I figured it was time to bring it out once more.

20170404_081219

We eat porridge most days during the winter, it is so warm and satisfying on a cold morning. It is quick to make, full of minerals, complex carbs, soluble and insoluble fibre to keep your large intestines happy…..and MEGA BONUS it’s “uber-scroogy” :-).

This winter I am changing my method ever so slightly. I am using whole rolled oats rather than the instant ones and I am soaking the oats over night.

Whole rolled oats are simply less processed than the instant ones and when it comes to food, I truly believe that the closer it is to it’s natural form when you buy it the better. Sure, you are going to soak, cook, mush, mix and mingle it all but at least you are in control.

Soaking the oats makes them cook quicker in the morning; important point number one when there are little people saying, “lets get up and have breakfast Mum, your taking too long”. Important point number two –  it activates the phytase enzyme and begins the process of breaking down the grain. This makes them easier to digest and decreases the phytic acid which binds minerals and enzymes in your body.

20170404_081204

One more quick tip before we get to the recipe, I have started adding a knob of butter to my porridge in morning :-). It adds a little good healthy fat to the meal which as we know, aids the absorption of fat soluble vitamins and provides the building blocks for brain and nerve cells.

Also butter is a good dietary source of vitamin D. If it is pastured raised that is, which in New Zealand thankfully all our butter is. Vitamin D is critical for the absorption of minerals, particularly calcium. So the vitamin D then becomes anther factor fighting against the mineral binding powers of the phytic acid.

on a little side note, the more I study nutritional science and health, the more I am amazed at how simple and yet complex it all is. We truly were designed to eat a varied diet, and more often than not, things that our ancestors did out of tradition or habit or whatever, have proven to have massive health benefits. Just as people and communities work together better when they help each other out, so do vitamins, minerals and other nutrients.

Learning the art of FOOD COMBINING could be the key to thriving health.

20170404_081033

So lets get to the recipe:

Chocolate Custard Porridge

  • 1 cups whole rolled oats – soaked overnight in water
  • 1/2 TBSP Butter
  • 1 TBSP Fair-trade Cocoa Powder
  • 1 tsp honey
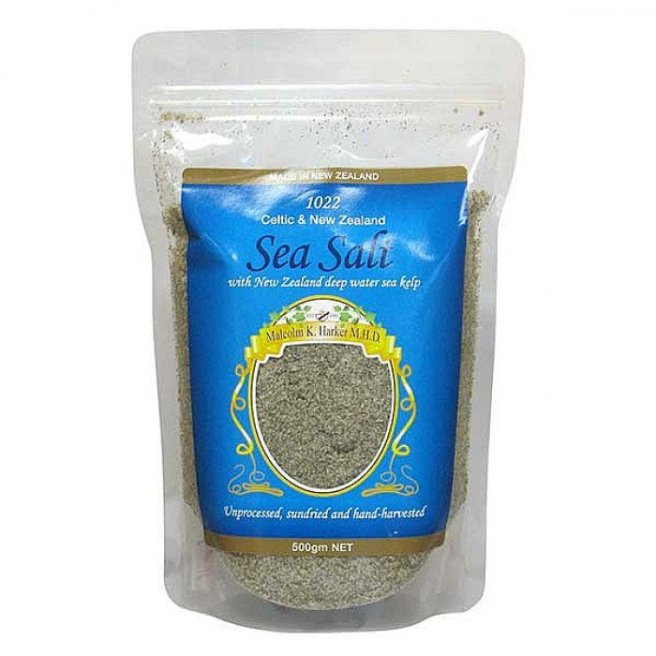
  • 1/2 tsp of salt – or to taste
  • sprinkle of cinnamon
  • 1/2 cup milk
  • 1/2 cup water

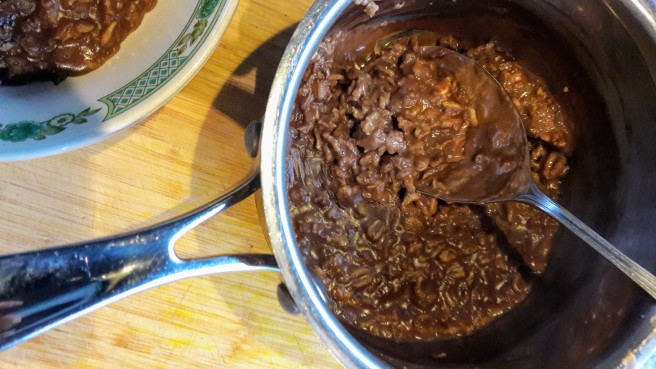
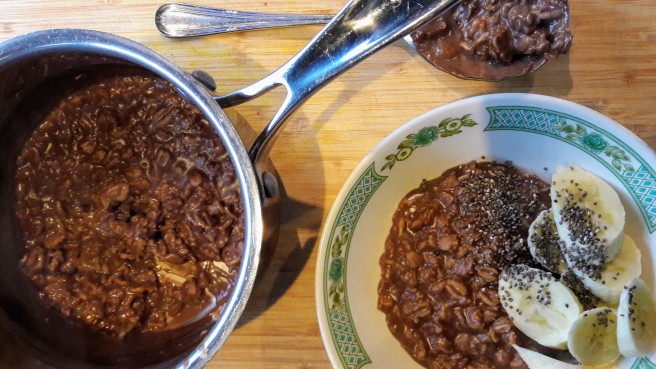
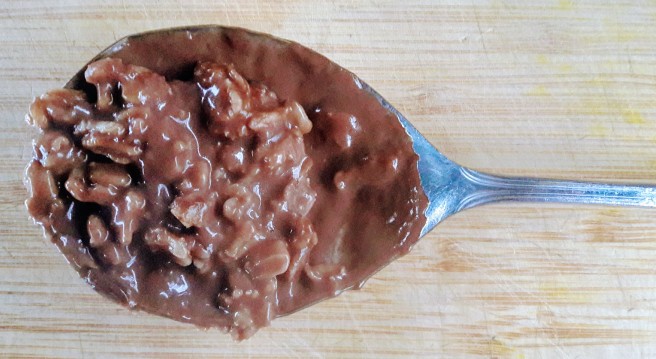
Drain the soaking water off the oats and put them into a pot. Add all the other ingredients and bring to a simmer. Simmer and stir for 5 minutes until the oats are super soft and drowning in thick chocolatey sauce.


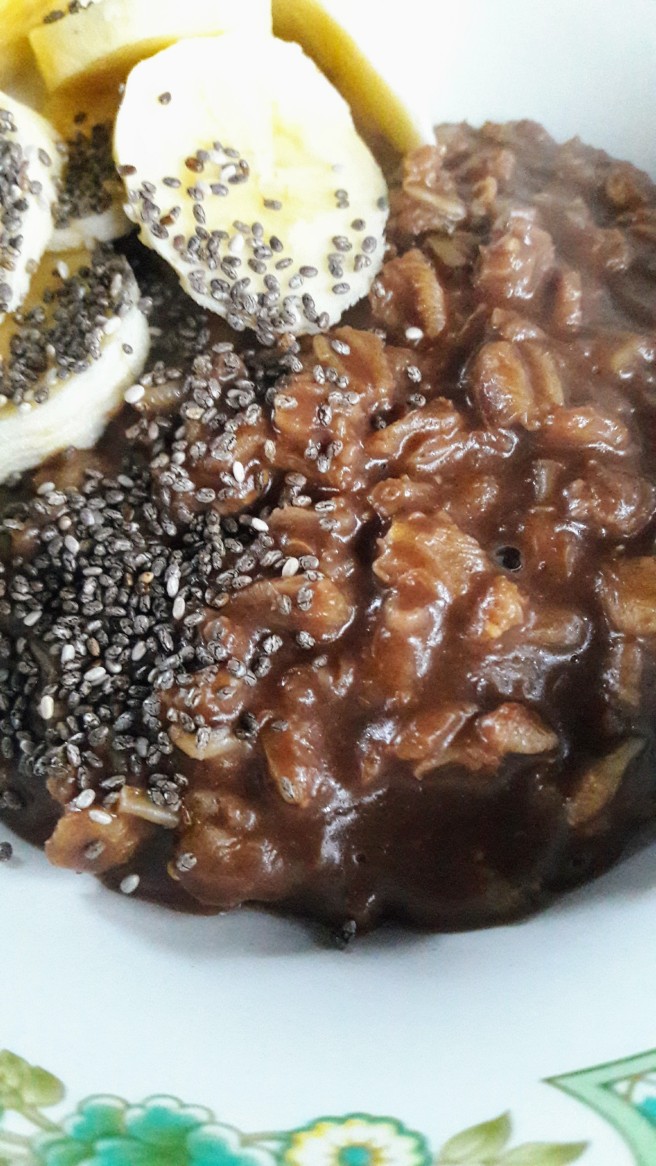
I like to think of porridge as a blank canvas, much like toast. It is not meant to be eaten as is, though I like it that way as well, but spice it up a little with some awesome toppings.

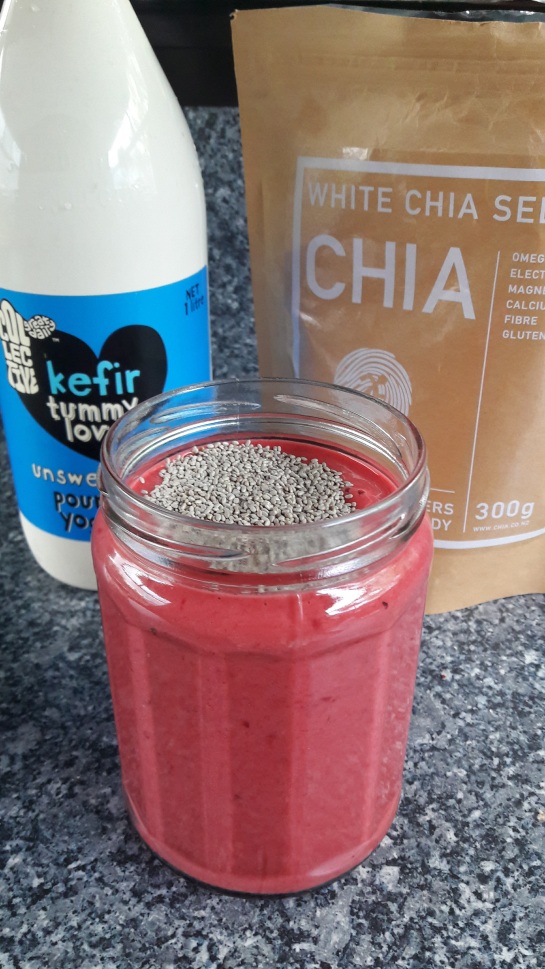
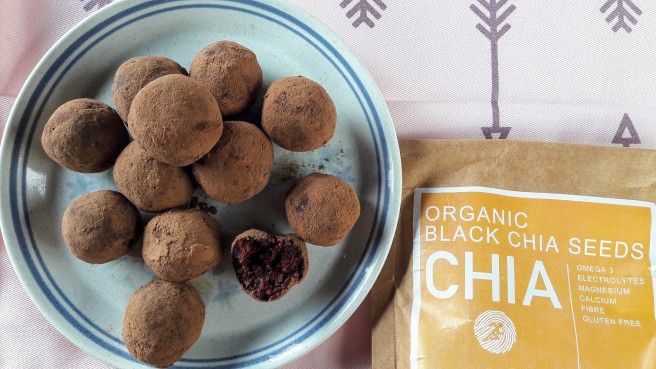
I like chia seeds for protein and omega – 3’s, some fruit (banana goes great with this chocolate porridge) and some natural yogurt for protein, extra calcium and a does of probiotics.

20170404_081042

20170404_081204

Comment and share how you like your oats. What other awesome oaty ideas are out there to make WINTER BREAKFAST amazing???


Homemade Baked Beans and Sausages

“Beans, beans are good for your heart! The more you eat, the more you….. ” Well I am sure you all know the rest of that one, but it doesn’t have to be the case.

20170401_174601

Prepared with time and care there is no reason why beans need cause any more digestive (or social) discomfort than any other food. The trouble is, in our fast paced instant world, we often forget the tradition, the art and the benefit of taking things slowly.

Lentils, legumes and grains are steeped in controversy nowadays, some saying they are not fit to be eaten while others praise them. The truth remains though, ancient cultures have lived on diets heavily dependent on these things for a generations. One size does not fit all when it comes to food but in most cases, with a bit of understanding on how to prepare them they can be not only good to eat but also beneficial.

The biggest issue with beans (and most grains, seeds, lentils and nuts) is that they have been “designed to survive”. This means they have been given natural defense mechanisms that help them to avoid digestion when consumed by animals or humans. So when they eventually see the light of day again, they can carry on their merry way and sprout and grow as if nothing has happened.

It all gets quite complex if you really start looking into the science of it all but the long and short of it is this:

  • Beans contain phytates/phytic acid and enzyme inhibitors which prevent them from being digested efficiently.
  • The enzyme phytase is needed to deactivate phytate/phytic acid
  • Beans contain their own naturally occurring phytase which needs to be activated
  • Soaking and sprouting activates phytase which helps to deactivate phytates/phytic acid making them more digestible and nutritious.

The human digestive system produces enzymes to break down foods, but we do not produce a lot of phytase, and some people produce more than others. This is why soaking and activating the naturally occurring phytase is so important. Interestingly, some lactobacilli bacteria also produce phytase, so having a healthy gut/microbiome could mean you may digest beans better than the next person.

Phytates/phytic acid, when not deactivated, binds up minerals and nutrients so that we can not digest them. Instead they will just be passed out of the body. This can lead to mineral deficiencies and other malnourishment conditions.

Phytic acid also binds up or deactivates our bodies own enzymes for metabolizing protein and carbohydrates. This means that food that would normally be broken down in the stomach and small intestines can passed into the large intestines relatively whole. It is then fermented by our gut bacteria and produces gas, so we end up with bloating and digestive discomfort.

Beans are a great, affordable food but they need to be prepared right. There are different methods out there, so play around and see what works, but basically a safe guideline is this:

  • Soak beans in warm slightly acidic (a dash of apple cider vinegar, lemon juice, whey etc) water for at least 12 hours.
  • Drain, rinse and cook SLOWLY in unsalted water until soft
  • Use or freeze as desired

So get some beans soaking and try this delicious Autumn Harvest inspired recipe:-

20170401_174332

Smoked Paprika Baked Beans with Capsicum and Sausages

1 red onion – diced
3 cloves of garlic – crushed
1 carrot – diced
splash of olive oil
3 red capsicums – roughly sliced
6 good quality butchers sausages
2 cups of cooked beans – I used haricot beans
2 tsp smoked paprika
2 bay leaves
optional – 1/2 tsp ground kelp
2 TBSP balsamic vinegar
salt and pepper
1 TBSP brown sugar
2-3 cups Tomato Passata
optional – 1/2 cup diced bacon (YUM!)

Saute the onion, garlic and carrots in the oil until lightly browned than transfer to a deep sided oven dish. Brown off the sausages and the capsicums in the same pan and add to the dish. Sprinkle over the beans, paprika,bay leaves, vinegar, salt/pepper, sugar and passata. Stir everything then cover and bake for 1 1/2-2 hours in a moderate oven.


20170401_181356

TIPS:

  • Serve these beans up for a cosy dinner with a big side of greens. Vitamin C has been shown to counteract the effects of phytic acid which is why a side of greens and the capsicums in the dish are a great combination.
  • Vinegar has been shown to increase the uptake of minerals which is why the balsamic in this dish is important. Not just for flavour but also to help counter the effect of mineral binding phytic acid.
  • Make a big batch and save left overs in portion size lots in the freezer for a quick meal of beans on toast

Comment and share how your bean cooking goes. Do you have any tricks that really make beans sing?


The Art of Constructing a BALANCED Smoothie

20170322_093425

How many times have you woken in the morning, determined to make a change, determined to start “eating healthy”???

So you make yourself a breakfast smoothie, because that’s what all the fit healthy people on Instagram do right?

You drink it down and feel completely righteous for about an hour and half, then give in to a carb and sugar loaded snack because you are actually just down-right starving!!!!

This is often the case because the smoothie is lacking one of the three macronutrients or is too high in sugar with not enough fibre. Smoothies made with a whole lot of high sugar fruit, sweetened yogurt and milk do little to keep you full, rather they give your blood sugar one big hit and an equally big drop an hour later.

Well we have all been there and it started me thinking more carefully about what we are really trying to achieve by having a smoothie. We want NUTRITION ie. a morning hit of vegetables and fruit that we wouldn’t get from toast or wheatbix. We want CONVENIENCE, something quick to make and easy to consume on the go. And we want AFFORDABILITY, it’s just breakfast after all. We don’t want to have to take out a second mortgage when toast IS an option. And last but probably the most important, we want SATIETY (that satisfying feeling of fullness).

So here are my tips for making a satisfyingly filling, nutrient loaded and completely affordable breakfast smoothie.

First things first – make it BIG enough!!!!! You wouldn’t expect half a piece of toast to keep you running all morning, and neither will a tiny half-glass kids sized smoothie. Everyone will be different but I need a good 500ml smoothie at least. Make it a decent size and take your time to enjoy it.

20161222_074044

Now for the actual “nuts and bolts”…

As a base for my smoothies I have three keys ingredients:-

  • 1 Banana
  • 1/2 cup of natural yogurt
  • 1 TBSP chia seeds

The banana gives sweetness, soluble and insoluble fibre and helps bind it all together and make it creamy and delicious.

The yogurt balances the flavour with a nice “tang” and adds some good nutrients like calcium and probiotics. Try coconut yogurt if you are dairy intolerant, or maybe coconut cream or nut milk.

The chia seeds add fibre, protein, and omega-3’s along with some vitamins and minerals. If I have none of these in the pantry a handful of rolled oats or raw nuts go just as well.

To this base you need to add some good healthy fat, this is to keep you feeling satisfied and full and to help the metabolism of the fat soluble vitamins A, D, E and K. Fat also keeps our brain happy and functioning well. Your brain is largely made up of saturated fat, as are your cell membranes and hormones, so giving your body what it needs by adding them into your diet just makes sense. I would usually add 1/2 an avocado or 1 dessertspoon of extra virgin coconut oil. Another option is to add in a handful of raw nuts, almonds are great and cashews make it super creamy.

IMG_20160927_124608
Macey knows how important healthy fat is….. he eats it by the handful!!!! Little mischief stealing coconut oil

Now we need the colour and flavour components. This is where we get to bulk up the vitamin and antioxidant load. Try:-

  • 1/2-1 cup of blueberries – I always keep a bag of frozen ones in the freezer
  • 2 handfuls of fresh spinach, silverbeet or kale
  • 1 cup of fresh mango or pineapple

20160922_124056

Lastly, a bit of liquid content and all you need is water, seriously. So  many recipes call for milk or nut milks which you can absolutely use, but with everything else in this smoothie they are unnecessary and frankly, just bump up the overall cost. Especially if you are using nut milk.

You can always add in any of the optional extras like protein powder, raw egg, greens powder or what I am enjoying at the moment, LIFESTREAM Sprouted Superfood Powder.

sprout superfood

CAM01002

So the keys here are:-

  • Make it BIG enough
  • Include all the macronutrients –  carbohydrates, protein and fat
  • Include plenty of fibre to fill you up and slow the absorption of glucose
  • Use vegetables and fruit as flavour and bulk, rather than relying on milks and flavoured yoghurts.
20170327_091803
Try this one – 1 banana, 1 TBSP Pic’s peanut butter, 1 TBSP cocoa powder, pinch of salt, 1 tsp LIFESTREAM sprouted superfoods, 1/2 cup natural yoghurt, 4 dates and some milk – its decadant and delish ❤

Comment and let me know what your favourite smoothie combo is….

Lacto-fermented Red Onions


20170317_11314420170317_11322120170317_113743

My life over the past couple of years has been full of bursts of “lacto-fermenting“! I ferment everything in sight for awhile and then forget about it, only to get back on the band wagon again a month or so later when I get a craving for sauerkraut (yeah that is right, I actually get cravings for that stuff, crazy I know).

Anyway, my fermenting victim this time was some beautiful sweet red onions. I realized they were one thing I hadn’t tried fermenting while I was watching Dad making traditional pickled onions with his homemade cider vinegar. Yum.

Lacto-fermented onions are similar to a vinegar pickled onion in flavour, but I would say a little more subtle. They have a mildly sour flavour, but not that real vinegary punch of pickles. The bonus of them is that the  lactobacillus bacteria, naturally occurring in dairy products and on the surface of fruits and vegetables, have eaten up the sugars and produced lactic acid along with other beneficial enzymes and vitamins…

“The proliferation of lactobacilli in fermented vegetables enhances their digestibility and increases vitamin levels. These beneficial organisms produce numerous helpful enzymes as well as antibiotic and anticarcinogenic substances. Their main by-product, lactic acid, not only keeps vegetables and fruits in a state of perfect preservation but also promotes the growth of healthy flora throughout the intestine.” Sally Fallon, Nourishing Traditions

Lacto-fermented Red Onions
Makes 2 medium sized jars

• 4 red onions
• 3 tsp salt (I like Himalayan pink salt)
• 3 cups of cold water (It can be a good idea to use cooled boiled water)

Slice the red onions as thickly or thinly as you like and pack into clean jars. Mix the salt into the water poor over the onions. Make sure the onions are completely covered by the brine as lacto-fermentation is an anaerobic (requiring an absence of oxygen) process. Put a lid on the jars and leave to sit at room temperature for 4-10 days. Open the jars once a day to release any gases that have built up. Store them in the fridge and they will be good for months.


The amount of time you ferment your onions for will depend on the air temperature. I left mine on the bench for 10 days and they are delicious! So the best bet is to just taste them from time to time and move them to the fridge or cold dark place once they reach a taste that you enjoy.

20170317_113840

So far we have eaten these for breakfast with eggs and mushrooms on toast, for brunch on a Saturday in a bacon butty, added into a fresh coriander and tomato salsa to go with chicken for tea and just on good ol’ crackers with cheese. They are great and you can literally add them in where ever you would use onion.

The fun thing about wild ferments like this is that you never know exactly what you are going to get. Interestingly enough, I made two jars of onions, one turned out great and one started really bubbling and getting a rather alcoholic smell to it. On the tenth day I tried both and one was delicious but the bubbly one really did taste a bit odd. At some point in the process some stray organism must have made it’s way into this jar and taken it down a whole other fermentation route. I didn’t like the taste or smell so unfortunately this jar went in the compost. Ya win some and lose some right? 🙂

Red Velvet Bliss Balls – gluten and dairy-free

A treat snack food made with healthy fat and vitamin rich vegetables??? Who would say NO to that? Not me. 🙂

20170312_121915

These gluten/dairy-free little beauties look so decadent, are deliciously soft, almost “moussey” and are just the perfect amount sweet.

They are made with beetroot which gives them their “red velvet” color, with the added benefit of loading them up with beta-carotene or provitamin A.

Beta-carotene is found in brightly colored fruits and vegetables like kale, carrots, tomatoes and beetroot, and is partly what gives them their color. Beta-carotene is converted by the body into Vitamin A which is essential for:

  • Healthy eyesight
  • Immune function – particularly involving the mucous membranes, ie the respiratory system. So those who suffer frequent sinus infections, sore throat etc could really benefit.
  • The bodies ability to lay down/create new cells. Skin, muscle, bones…. they all require good levels of vitamin A

You often hear about the risk of taking too much vitamin A and it becoming toxic to the body, particularly if you are pregnant.

The benefit of getting your vitamin A from plants in the form of beta-carotene instead of from animal sources (retinol) is that the body will only convert what it needs into active vitamin A (retinol). This means it is almost impossible to reach toxic levels, you would literally have to eat kilos of vegetables a day and even then you wouldn’t overdose, your skin might just change color.

I also added some delicious extra virgin coconut oil to this recipe. Coconut oil has health benefits all of its own and it helps to hold the bliss balls together but the key reason I added it to this recipes is that the body requires fat to absorb vitamin A.

So along with the fibre and omega-3’s from the chia seeds, these balls are the perfect little energy giving snack.

20170312_121756

Red Velvet Bliss Balls

2 medium sized beetroot
1 ½ cups dates
2 big TBSP Extra Virgin Coconut Oil
Big pinch of salt
2 TBSP cocoa powder, plus extra to roll them in
½ cup Chocolate chips
½ cup Black Chia Seeds
½ cup Psyllium husks
Simmer the beetroot in a pot with some water until they are tender, remove the skins if desired. Add the dates to the pot and let them sit in the water for about 10 minutes to soften. Drain off the water and puree the beets and dates together. Mix in the coconut oil until melted then add all the dry ingredients. Mix well then sit the mixture in the fridge for about 30 minutes to firm up enough to roll into balls. Roll and coat in the extra cocoa powder. Store them in the fridge or freezer to keep them firm.


20170312_121943

Comment or like below if you enjoy this recipe, or if you have used beetroot in your own sweet treats before. XXX

Spinach and Herb Popovers

20170302_105221.jpg
These are my own version of a recipe I saw on Jamie Oliver’s foodtube the other day. I used what I had but stole the concept, ie. a cross between a fritter and a scone, cooked in a frying pan. It feels like camping, old school “billy scones”! Yum
The trick with these is you can’t rush the cooking time. Because they are a a thicker consistency than a fritter and cooked in an open pan, they need to be done slowly over low heat so you don’t end up with raw middles and burnt bottoms 😀
For one serving: (about 4 pop overs)
1 cup shredded spinach
handful of shredded herbs ( I used fresh basil and oregano)
1 big free range egg
1/2 cup flour
big pinch of salt
1/2 tsp baking powder
1 heaped tablespoon of cottage cheese (you can substitute with a handful of grated cheese and a dash of milk if you don’t have cottage cheese)
Mix together, scoop up big spoonfuls and cook in a fry pan with some olive oil over a low heat. Leave them to cook for about 3 minutes and then “pop them over” and cook the other side for a few minutes until they feel firm and cooked through. Eat them up while they are warm, or freeze them to reheat for a quick snack later on.

While these were cooking I prepared a couple of jars of red onions in a Himalayan salt brine. I am going to leave these on the bench to lacto-ferment over the next week…. will let you know how delish they are when they are ready.

Anyone else every fermented red onions? I have done cabbage, ie sauerkraut, a Caribbean style chutney and beetroot (delicious) before but not onions…. so we will see how they go.
20170302_105205

Courgette, Cream Cheese and Tomato on toast

The perfect little summer breakfast .

20170123_092049.jpg

Another courgette recipe!!! It’s called “seasonal eating” folks and it’s right at the heart of The Health Conscious Scrooge philosophy:-
IT’S HEALTHY – there are way more nutrients in a freshly picked, in season vegetable than one grown out if season or shipped across the globe.
IT’S SCROOGY – in season produce is always more affordable.

I came up with this wee combo a couple of weeks back, and have been making sure I have cream cheese in the fridge ever since. It’s so tasty and quick, and what a way to get some vegetables into your breakfast!
Use a peeler and shave some courgette into a bowl, drizzle it with salt, pepper, lemon juice and olive oil. Spread a crispy bit of toast with a thick layer of cream cheese and top with the courgette mix and some thick slices of a super ripe tomato!
It’s that quick! Give it a go

20170123_092339

Courgette and Cannelini Bean Fry-up

Today’s recipe is brought to you by the letter “C”….

~Courgette and Cannelini Bean Fry-up~

20170121_123517

Gluten-free and Dairy-free if you use oil instead of butter (but if you can, butter and courgette are a match made in heaven!)

By now anyone who has been following me for awhile will know I love these creamy beans nearly as much as I love Jamie Oliver!!!! They are just so versatile, pull out a can from the cupboard and whip up so many satisfying meals. They are super affordable (scrooge big tick) and you can even get nice Organic ones at the supermarket for not too much. So if you haven’t tried them yet, get some, give them a go and let me know what you think.

For this satisfying wee lunch time fry-up:

  • 2 cups diced Courgette
    1 tin Cannelini Beans
    1-2 big cloves Garlic – crushed
    1-2 inch “knob” of salami – diced
    2 chopped tomatoes
    1 tsp wholegrain mustard
    salt/pepper/ground kelp*
    Big TBSP Butter

Heat the butter in a pan and add the courgette, let it cook for a few minutes until it just starts to soften. Add in the garlic and salami, give it a few more minutes to impart their glorious flavour!  Now add everything else and season to taste. Leave it to cook for a few minutes more until the tomatoes begin to “melt down” a little.

Serve it all up drizzled with some good quality Extra Virgin Olive Oil and even a sprinkle of Parmesan if you have it on hand.

This can be eaten fresh or put in the fridge for workday lunches.

*NOTE on the ground kelp. I like to add ground kelp to my cooking as it is a great source of minerals, and in particular iodine. If you use himalayan pink salt or sea salt rather than a standard iodized table salt, it is good to add some kelp into your diet. A lot of people are deficient in iodine as it is often deficient in our soil and not commonly found in a lot of our foods.
60% of the bodies iodine is stored in the thyroid gland and is necessary to produce thyroid hormones. Thyroid hormones control loads of functions in the body but in particular our Metabolic rate and Immune system. This means basically iodine is a key mineral necessary for helping us #1) not to get sick easily and #2) helping us to process calories efficiently, not store them as fat, but use them for sustained energy throughout the day.

kelp
You can buy ground kelp on its own, or try this lovely blend of kelp and sea salt from Harker Herbals. 

https://www.harkerherbals.com/


Quick and Easy One pan Lunch

20170109_125228

This is not an uncommon breakfast or lunch for round here these days…. throw some tomatoes and mushrooms in a pan for a few minutes, add in a fried egg. Plate it up with some chopped salad bits and top it all with a sprinkle of salt and a squeeze of lemon juice.

It’s tasty
It’s satisfying
and its nutritionally (fairly) complete!

Heres the breakdown:

*1 or 2 eggs. This is your protein component, not to mention minerals, some iron, essential fatty acids and so on. It will keep you going over the day and provide the amino acids needed to rebuild and repair muscles and tissue.

*BIG pile of mushrooms – mushrooms are high in B vitamins, which being water soluble we need to provide in our diet or supplement on a daily basis. B vitamins a so critical for nearly every aspect of our health from immunity to nerve function, brain clarity, stress response and glowing skin. There are even studies out there that have found people that substitute a red meat meal for mushrooms a couple of times a week see significant weight-loss benefits

* Tomato – bright red and packed full of phytonutrients, antioxidants and carotenoids. Studies have linked tomato consumption with improved cardiovascular health in 2 specific areas 1) free-radical protection of the blood vessels and heart tissue due to the high level of anti-oxidants. 2) lowered levels of total cholesterol in the blood. They are also brimming with nutrients that help us to have beautiful clear skin and eyes.

*1/2 Avocado – this is great for sustaining energy levels throughout the day, the good fat helps you to metabolize all the fat soluble vitamins in the tomatoes and mushrooms, and the essential fatty acids help to build good cell walls for beautiful skin, they also provide energy for the brain to avoid the mid-afternoon brain fog. Don’t be afraid of the fat! The fat you eat is NOT the fat you wear (unless your gorging fries for lunch – naughty)

* Something fresh and green – today I had cucumber, but it could be some shredded spinach or kale or lettuce or broccoli or yeah anything green. Not only does this component round out the flavours well from a satisfactory point of view, and offer some fresh crunch and body to the meal, its your vitamin C hit, your magnesium hit, maybe a bit of iron, some beta-carotene etc etc.

*seasoning – sprinkle with some Himalayan pink salt and ground kelp for iodine and loads of other essential minerals, a bit of cracked pepper for flavour and a wee squeeze of lemon juice to tie it all together.

So there you go, with a couple of minutes in a pan you have a plate full of protein, vitamins, minerals and essential fats that will fuel your day and help to build a strong and healthy body. Eating for good health is not just about today either, its about looking ahead and thinking “what kind of body do I want to live in in 10 years or 20 years time?” Just like a car, keeping our body in mint condition now is always going to look (and feel) better than patching it up later on.

Caribbean Pork w/ Mango and Coconut Rice

20170108_172803

I have been buying mangoes lately, lots of mangoes!

I prefer to eat local fruits and vegetables mostly but I can’t help myself when it comes to mangoes. I always do check them though, mangoes are one product that are often irradiated, and if they have been I don’t bother with them.

On a side note, all products that have been irradiated, by law must be labelled as so in New Zealand, so check the produce sticker.

Anyway I had a wee burst of inspiration yesterday and thought I would make something with a slightly different flavour twist to what I might normally make and I was rather happy with it, if I do say so….. of course its not traditional, but when do I ever cook traditional flavours?

Caribbean Mango Pork

400g diced pork
1 red onion – diced
3 big cloves new season garlic – crushed
1 TBSP coconut oil
CARIBBEAN SPICE MIX:
1/2 tsp ground cumin
1 heaped tsp smoked paprika
1/4 tsp cinnamon
1/4 tsp nutmeg
1/4 tsp chilli flakes
1 tsp salt
2 tsps brown sugar
1/2 tsp cracked black pepper
1 cup tomato passata
1 TBSP worcester sauce
1 mango – diced

Heat the coconut oil in a pan and saute the red onion and garlic, add the pork pieces and brown. Sprinkle over the spice mix and add a little more coconut oil if too dry. Fry for another minute to pep up the spices. Add the tomato passata and the worchester sauce. Bring to a gentle bubble on the stove and then mix in the diced mango. Allow to simmer on low heat, stirring occassionally while the rice is cooking.

For the rice:
1 cup coconut cream
1 cup water
good big pinch of salt
cracked pepper
1 cup rice

Bring the coconut cream and water to the boil in a pot with the salt and pepper. Add the rice, turn heat down to low and allow to simmer for about 10 minutes. Keep and eye on it though as the coconut cream will make it boil up and over. Check if the rice is done when all the moisture has been absorbed and add a dash more water if it needs a little more cooking. Fluff up with a fork when cooked and add a squeeze of lemon or lime juice

Serve it all up with a nice shredded salad, I made a fairly basic coleslaw with some bits and bobs from the fridge and mixed through a little whole egg mayo with a tiny grating of fresh ginger for bite.

Yum yum…. this pork would also serve up well with some tortillas or even over corn chips to be honest, its super tasty, just a little spicy and just a little sweet.

20170108_172713